Collage with a Message
Senior 1 · Fine Arts
Collage with a Message
Lesson 5 of 5
25 min
This lesson begins with a demonstration. As you watch, count the steps the artist takes before any glue is used.
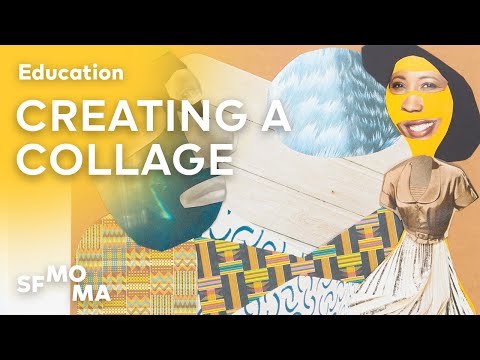
<em>Creating a Collage: An Art Project Inspired by Romare Bearden</em>, from the San Francisco Museum of Modern Art. Watch how the pieces are gathered, cut and moved around the page before they are stuck down, and how the background is laid first.
A good collage is built from the back to the front, in layers, and nothing is glued until the whole arrangement has been tried out dry. The three hand skills in Figure 1 decide whether the finished work looks deliberate or accidental.
Definition
Layering: building a collage in order from the background to the foreground, so that nearer things overlap farther ones.
Dry layout: arranging all the pieces on the support without glue, to check the composition before anything is fixed.
Warning
Working safely while you assemble
Worked example: mounting with an even border
Keza's finished A3 collage measures 29.7 cm by 42 cm. Her mounting card is 40 cm by 50 cm. How far from each edge should it go?
Side borders:
Top and bottom borders:
She marks light pencil dots 5.15 cm in from each side and 4 cm down from the top, then lines up the corners of the collage with the dots.
A message collage is finished only when people see it. Display it at eye level, in a place where its audience will pass, with a short artist's statement beside it.
Definition
Artist's statement: a short text, usually 50 to 100 words, in which the artist explains the title, the message, the materials and the main choices made.
Critique: a careful, fair discussion of an artwork that describes it, analyses it, interprets it and judges it, giving reasons.
Worked example: an artist's statement
“Plastic is Choking Lake Kivu”, by Keza, S1, 2026. Mixed-media collage: painted paper, magazine photographs, dried banana leaf and kitenge on card, 29.7 × 42 cm.
“I made this collage for the people who sell and buy fish at the market in Rubavu. The fish trapped in a bottle is the focal point: I placed it where the rule-of-thirds lines cross so it is seen first. The lake is torn magazine paper, and the hills are banana leaf, to show that the lake and the land are one home. I want viewers to carry a basket instead of a plastic bag.”
Notice what the statement does: title and facts, then audience, then one or two key choices with reasons, then what the viewer should do.
| Step | Question to ask | Example answer |
|---|---|---|
| 1. Describe | What can I see? | A fish inside a bottle, a blue lake, a small kitenge boat, words at the bottom. |
| 2. Analyse | How is it arranged and made? | The bottle sits on a third-line crossing; torn edges on the lake, cut edges on the bottle. |
| 3. Interpret | What does it mean? | Plastic waste is harming the lake that feeds people. |
| 4. Judge | How well does it work, and why? | The message is clear in seconds; the slogan letters are uneven, so the words are harder to read. |
| Criterion | Strong | Developing |
|---|---|---|
| Message | one clear message, understood in seconds | several ideas, or unclear |
| Composition | clear focal point; balanced layout | no focal point; crowded or empty |
| Materials | materials chosen to support the message | whatever was nearest |
| Craftsmanship | flat, no glue marks, edges chosen on purpose | lifting corners, wrinkles, glue shine |
| Statement | explains audience, choices and reasons | lists materials only |
Tip
“Dry, glue, press.” Always do a dry layout, glue from the back to the front, and press overnight. In a critique, never jump straight to “I like it”: describe and analyse first, then judge with a reason.
Practice
Put these steps in order: glue the focal point; dry layout; press overnight; glue the background; add the words.
Why is the focal point usually glued after the background and middle ground?
A collage 30 cm wide and 40 cm tall is mounted on card 36 cm by 48 cm. What are the side borders and the top and bottom borders?
Give two ways of avoiding wrinkles and glue marks.
A classmate's critique says only: “It is nice. I like the colours.” Evaluate this critique and rewrite it using the four steps.
Finish and mount your own collage, write a statement of 50 to 100 words, and give a four-step critique of a classmate's work.
1. Dry layout; glue the background; glue the focal point; add the words; press overnight.
2. It sits at the front, so gluing it last means nothing overlaps it by accident, and you can check that it still stands out once everything else is in place.
3. Sides: . Top and bottom: .
4. For example: spread glue thinly from the centre to the edges on the back of each piece; use textured papers made before cutting; smooth each piece from the centre outwards; press under books overnight; glue on scrap paper and wipe fingers often.
5. It judges without describing, analysing or giving reasons, so the artist learns nothing. Better: “I see a large bottle with a fish inside on a blue background. The bottle is the focal point because it is the only sharp, cut shape. I think it means plastic is trapping the lake's life. It works well, but the slogan is too small to read from the door.”
6. Practical. Use the assessment table to check your own work first.
Further reading
Sources and credits