Robot Logic in Scratch
Senior 3 · ICT
Robot Logic in Scratch
Lesson 2 of 5
50 min
A Scratch program can drive a sprite across the stage, or, through an extension, drive real motors on a desk. The logic is the same: read a sensor, decide, act. This lesson looks at the hardware that schools use to program real robots with Scratch, the Scratch block categories that control a robot, and the variables that store what a robot knows. If your school has no robot kit, every activity in this unit also works as a simulation on the stage.
Definition
Microcontroller board: a small, cheap computer on one board that reads sensors and controls outputs, such as the BBC micro:bit.
Extension (in Scratch): an extra category of blocks added with the Add Extension button, such as Pen, micro:bit or LEGO MINDSTORMS EV3.
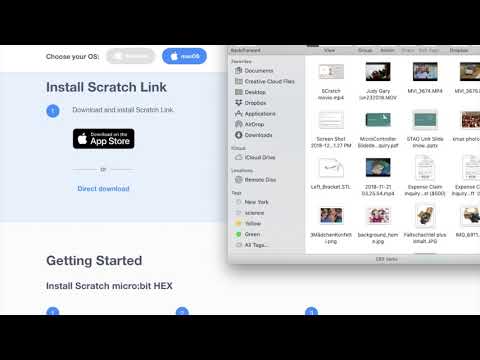
Scratch Link: a free program from the Scratch Team that lets Scratch 3 talk to hardware over Bluetooth on Windows and macOS.
Simulation: a program that imitates a real system, so its behaviour can be tested safely and cheaply on screen.
| Item | Why it is needed |
|---|---|
| Computer or tablet with Scratch 3 | To write and run the program: online at scratch.mit.edu or with the Scratch app. |
| Bluetooth and Scratch Link | Scratch's hardware extensions connect by Bluetooth. On Windows and macOS, Scratch Link must be installed and running, and the computer needs a Bluetooth receiver. |
| A programmable board or kit | The robot's controller. Scratch 3 has extensions for the BBC micro:bit, LEGO MINDSTORMS EV3, LEGO Education WeDo 2.0, LEGO BOOST and a Vernier force-and-acceleration sensor. |
| Sensors | Built into the board (the micro:bit has buttons, a tilt sensor and more) or added (EV3 distance, touch and colour sensors). |
| Actuators | Motors, lights, buzzers. A micro:bit drives motors through an add-on board; an EV3 brick has four motor ports. |
| Power | Batteries for a robot that moves away from the computer. |
| Cables and a body | USB cable to set up the board; a chassis with wheels to build on. |
To use a micro:bit with Scratch, it is set up once with a special program (the Scratch micro:bit HEX file, from Scratch's micro:bit page). Then in Scratch: Add Extension → micro:bit, and connect it in the window that opens.


| Category | Robot job | Examples |
|---|---|---|
| Events (yellow) | Start the robot, or react to a message | when green flag clicked; when [space] key pressed; broadcast; when I receive |
| Control (orange) | Repeat the sense–think–act loop and make decisions | forever; repeat until; if … then; if … then … else; wait |
| Motion (blue) | Move and turn a simulated robot | move (3) steps; turn right (90) degrees; point in direction |
| Sensing (light blue) | Simulated sensors | touching [Wall]?; color [ ] is touching [ ]?; distance to [ ]; loudness; timer |
| Operators (green) | Compare readings and combine conditions | ( ) < ( ); ( ) > ( ); and; or; not; pick random |
| Variables (dark orange) | Store readings, speeds, counts and states | set [speed] to (2); change [turns] by (1) |
| My Blocks (pink) | Name a behaviour you use often | define turn left (angle) |
| Extensions | Real hardware, or drawing the robot's path | micro:bit, LEGO MINDSTORMS EV3, Pen |
A robot must remember its speed, its last sensor reading, how far it has gone and what it is doing. Each is a variable: a named store whose value can change while the program runs.
Here is a simulated robot. Draw a top view of a small robot as a sprite called Robot and add the Pen extension so that it draws its path:
A My Block turns a common action into one named block:
And with a micro:bit connected, its buttons can start and stop the simulated robot:
Block diagrams drawn by Ganzaa. Teal: extension blocks (Pen, micro:bit); pink: My Blocks.
Worked example 1: speed, distance and time
The simulated robot moves speed = 2 steps per frame, and Scratch runs about 30 frames per second, so it covers steps (pixels) per second. The stage is 480 pixels wide; starting at x = −180, the right edge (x = 240) is pixels away.
After 5 seconds, the distance travelled monitor shows about . Setting speed to 3 makes the trip s. One variable changed the whole behaviour, without editing the loop.
Worked example 2: from screen to hardware
The same decision can be written for a sprite or for a real robot. Only the sensing and acting blocks change:
| Job | Simulation on the stage | LEGO MINDSTORMS EV3 extension |
|---|---|---|
| Start | when green flag clicked | when green flag clicked, or when button [1] pressed |
| Sense distance | (distance to [Box]) | (distance) |
| Sense touch | <touching [Wall]?> | <button [1] pressed?> (a touch sensor in port 1) |
| Move | move (3) steps | motor [A] turn this way for (1) seconds |
| Signal | say [Stop!] | beep note (60) for (0.5) secs |
The if, forever and comparison blocks are identical in both. That is why programmers test robot logic in a simulation first: it is quick, free, and nothing gets broken.
Warning
Working with real robots
Design&Tech: Scratch 3 and the BBC micro:bit: connecting a micro:bit to Scratch and using its extension blocks.
Practice
Sources and credits
This lesson adapts CC BY-SA material and is shared under CC BY-SA 4.0.