Modelling Animal Figures
Senior 3 · Fine Arts
Modelling Animal Figures
Lesson 3 of 4
25 min
The clay dog below was made in China in the first or second century CE. It is about 21 cm high and 28 cm long. Look at how it was built to last: four short, thick legs set wide apart, a compact barrel of a body, a short neck, and a tail curled up tight against the back instead of sticking out. Nothing thin projects to snap off. These are the same choices you face when you build your own animal in clay. In this lesson you will build the body: the big masses first, then the joins, then the drying.

Definition
Additive modelling: building a form by adding clay; subtractive modelling removes clay by cutting or carving.
Pinch pot: a hollow form made by pressing a thumb into a ball of clay and pinching the walls thinner while turning it.
Coil: a rope of clay rolled by hand. Slab: a flat sheet of clay rolled to an even thickness.
Slip: clay mixed with water to a thick cream, used like glue. Score and slip: scratching criss-cross lines on both surfaces, adding slip and pressing them together.
Leather-hard: clay that is partly dry, firm enough to hold its shape but still soft enough to carve and join.
| Method | How | Best for |
|---|---|---|
| Solid over an armature | press clay in small pieces onto the padded armature from Lesson 2 | plasticine and air-drying clay that will not be fired |
| Two pinch pots | join two pinch pots rim to rim to make a hollow egg, then shape it | bodies of animals to be fired, such as cows, pigs and birds |
| Solid, then hollowed | model a solid form, cut it open when leather-hard, scoop out the inside and rejoin | heads and bodies with detailed shapes |
| Coils and slabs | roll coils for legs, necks and tails; cut slabs for ears and flat parts | adding parts to the main body |
Clay that will be fired must be hollow, or no thicker than about 2 cm anywhere. Thick, solid clay holds water and air deep inside, which can crack or burst the piece in the kiln. Hollow forms also dry more evenly and weigh less, which helps the legs.
Roll legs as thick coils, wider at the top. Score and slip the leg and the body, press the leg on with a slight twist, then blend the seam and press a thin coil into the angle (Figure 2). Join parts while both are at the same dampness; a wet leg on a leather-hard body will crack as it shrinks. Keep thin projections such as ears, horns and tails short, or attach them along the body like the curled tail of the Han dog.
For a solid figure on an armature, press small pieces of clay firmly onto the padding, working from the inside outwards, and keep turning the work so you see every side. Build the big masses (body, neck, head) before the legs, and keep checking proportions against your drawing.
Worked example 1: allowing for shrinkage
Isimbi's clay shrinks by about 12% between wet and fired. Her wet model is 25 cm long. How long will the fired piece be? How long must she model it to finish at 25 cm?
Fired length: 12% shrinkage leaves 88% of the length: .
Wet length for a 25 cm result: .
Shrinkage varies between clays, so test your own: mark a 10 cm line on a wet tile, fire it and measure again.
Worked example 2: a crack where the leg meets the body
After drying, Rukundo's cow has a crack all round the top of one leg.
Diagnosis. Possible causes: the leg was pressed on without scoring and slip; the leg was much wetter than the body, so it shrank more; or the leg carried the body's weight while still soft.
Prevention. Score and slip both surfaces, join pieces of the same dampness, add a reinforcing coil, and prop the body while it dries.
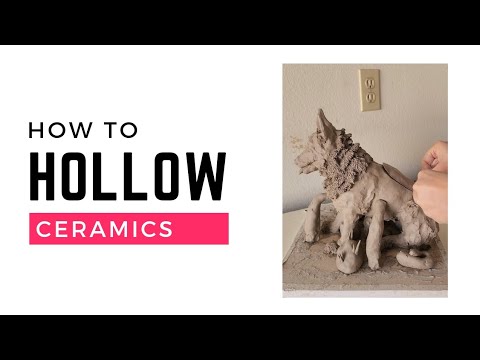
<em>How to hollow a ceramic animal sculpture with free standing legs</em>, from RAD Potters. Watch how the body is opened, hollowed and closed again, and how the legs are kept strong enough to stand.
Warning
No air hole, no firing. A closed hollow form must have a small hole before it goes in the kiln.
Clay dust. Dry clay dust is harmful to breathe. Wipe tables with a damp cloth instead of sweeping, and wash your hands after work.
Tip
Big masses first; same dampness to join; score, slip, blend
Practice
What is the difference between additive and subtractive modelling?
Why should a clay animal that will be fired be hollow or no thicker than about 2 cm?
Describe the four steps of a score-and-slip join.
Clay shrinks by 10%. A wet model is 30 cm long. How long is it after firing?
Why does trapped air help while you shape a pinch-pot body, and why must it be let out before firing?
Compare the Han dog's design with a clay animal that has long thin legs and an outstretched tail. Which will survive drying, firing and handling better, and why?
Build task. Construct the body, neck, head and legs of your animal using a method suited to your clay. Record which joins you made and how you dried the piece.
1. Additive modelling builds a form by adding clay; subtractive modelling removes clay by cutting or carving.
2. Thick, solid clay holds water and air inside, which can crack or burst the piece in the kiln; hollow forms dry and fire evenly and weigh less.
3. Score both surfaces with criss-cross lines; brush on slip; press the pieces together with a slight twist; blend the seam (and add a coil if needed).
4. .
5. The air pushes back against the walls so they keep their shape while you press and paddle. In the kiln the air expands with heat, so it must be able to escape through a hole or it can burst the form.
6. The Han dog: its thick, wide-set legs, compact body and tail curled against the back leave nothing thin to crack or snap, and it is stable. Long thin legs and a projecting tail dry unevenly, carry weight badly and break easily.
7. Check: a method suited to the clay; scored and slipped joins; an air hole if the piece is hollow and will be fired; slow, covered drying.
Which join on your animal are you least sure of? What will you look for when you check it tomorrow?
Sources and credits